 As I try to finish projects I've started over the summer, more ideas spike in my head. I jot most of them down in my notebook, and rarely follow through. This, however, is one of the projects I happened to think of and got all the supplies right away. They are so quick & easy to make, and the results are quite good considering the materials!
All it takes to make these are large glass pebbles with flat backs (I found mine at a dollar store, I counted 25 in my bag), card stock, permanent markers or colored pencils, and Modpodge. Simply trace the glass pebble onto card stock with a pencil, draw inside the circle whatever you want, then glue it to the back of the pebble. So easy! So cute! And the possibilities are limitless. Mine are going to be necklaces, but I can see worry stones, maybe gluing a photo on the back instead, plant markers, etc.!
Pinterest makes me want things. For example, there are great tutorials on creating with ModPodge, however anything printed with an inkjet printer will bleed, which is now why I want a laser printer.
...and a silhouette for cutting out pretty & perfect images
...and a pasta roller to make my Sculpey flat & blended.
...and a serger to keep edges from fraying
...and an embosser, a dremmel, a sander —the list goes on.
Maybe someday, I'll win the lottery & will be able to buy everything pinterest makes me think I need.
As I was knitting today, I noticed a HUGE error in my elf hat pattern. I have gone back and revised it. If you've attempted to make a hat with the previous pattern, I am terribly sorry! Now that it's fixed, it should be easier to make! Just for good measure, I'll throw in a link to my favorite mitten pattern. I'd like to note that the pattern says to knit them on straight needles, but it's quite easy to adapt the pattern for the round so you don't have to sew the mitten up the edge when you're done! http://www.knittingatknoon.com/mittenpatt.html
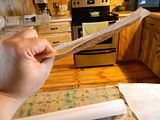
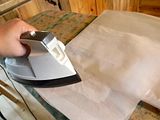
I told you all there would be something new, didn't I? Well here it is! My attempt at plastic bag fusion. I saw this tutorial on Etsylabs and thought i'd try my hand at it. Materials: plastic grocery bags, iron & ironing board, parchment paper, scissors.
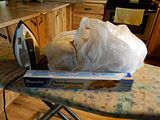
1. Cut the top handles and bottom off the bag so that it's a tube. I used 4 bags total so there were 8 layers.
2. Sandwich the stack of bags between two layers of parchment paper.
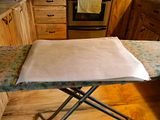
3. Iron evenly & make sure it stays moving. You'll have to play with the heat settings, I started off low and ended up on the first cotton setting.
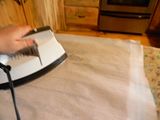
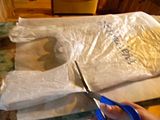
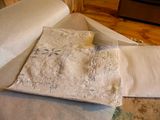
4. You'll start to see the plastic shrinking through the parchment paper. The thickness of the finished plastic will vary depending on how long you iron. I shrunk mine about 30%, resulting in a thicker plastic canvas feel.
5. Once I had that sheet of plastic, I thought on what to do with it. I ended up folding it in half, putting a piece of parchment paper in the middle of it, and ironed the edges to make a bag.
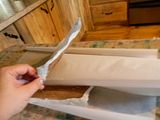 
6. I trimmed the edges so it didn't look so raw.
 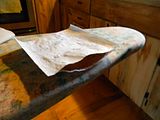
I know i made a bag of some sorts, but what to use it for now? Perhaps a reusable sandwich bag? Oh, the possibilities!
I don't think I've ever asked before, but have you checked out the rest of the website? Right there on the left-hand side are a bunch of tabs. Did you know you can request a hand-made item from me? Yep. Send me a message on Facebook, or click that "Contact Us" button. Even if your idea is extravagant, I'll talk through it with you. (I'm a nice person sometimes, honest!)
Also, under "Purchase" you can see items I've already made and are for sale on Etsy!
If you haven't already, please go like my Facebook page!
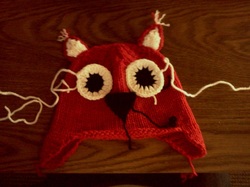 This was such a fun hat to make. It was also the first hat where I incorporated both crocheting and knitting. The main red part of the hat is knit, as is the beak. The eyes and white stripe along the edge are crocheted. The ears, while knit, are two pieces crocheted together.
 The finished product actually surprised me with how good it looks! I had to teach myself how to crochet a circle just to do the eyes. I managed to find a way to sew the accessories on which made the hat still able to stretch a good amount while keeping everything secure.
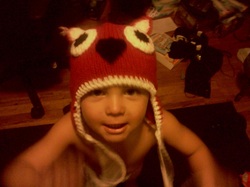 My son thinks this hat is for him... I hope he's not too sad when it goes out in the mail! I suppose I'll have to make one for him next ;)
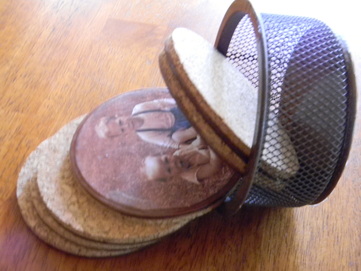
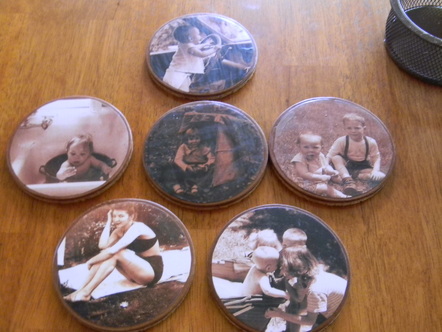 I made these precious coasters for my mom's birthday. I utilized childhood pictures to make it ultra personal. Materials:- 4inch wood topped cork rounds (I found mine in the gardening section at walmart)
- Modpodge
- A paintbrush
- 5x7 photos
- Something to put them in
- Possibly sandpaper
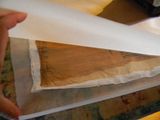
- Start by choosing your photos. I found some incredible photos from my mother's childhood. I scanned them, and sent them out (as 5x7) to be printed at Walmart. Do not use an inkjet printer because the ink will bleed in later steps.
- Once you have your photos, place your cork rounds over the photo and trace. Make sure you have the focus of your picture under the cork. Cut along your tracing.
- Get your modpodge and paintbrush out and slather a layer on the wood part of the cork round.
- Place your picture face up on the glued surface. If your photo overlaps, wait for the glue to dry, then lightly sand the edges. Slather more modpodge on top.
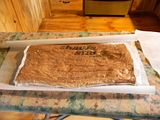
- Let the glue dry (approx. 20 minutes), and put on another coat. Repeat a few times.
- Cure for 24 hours in a dry area.
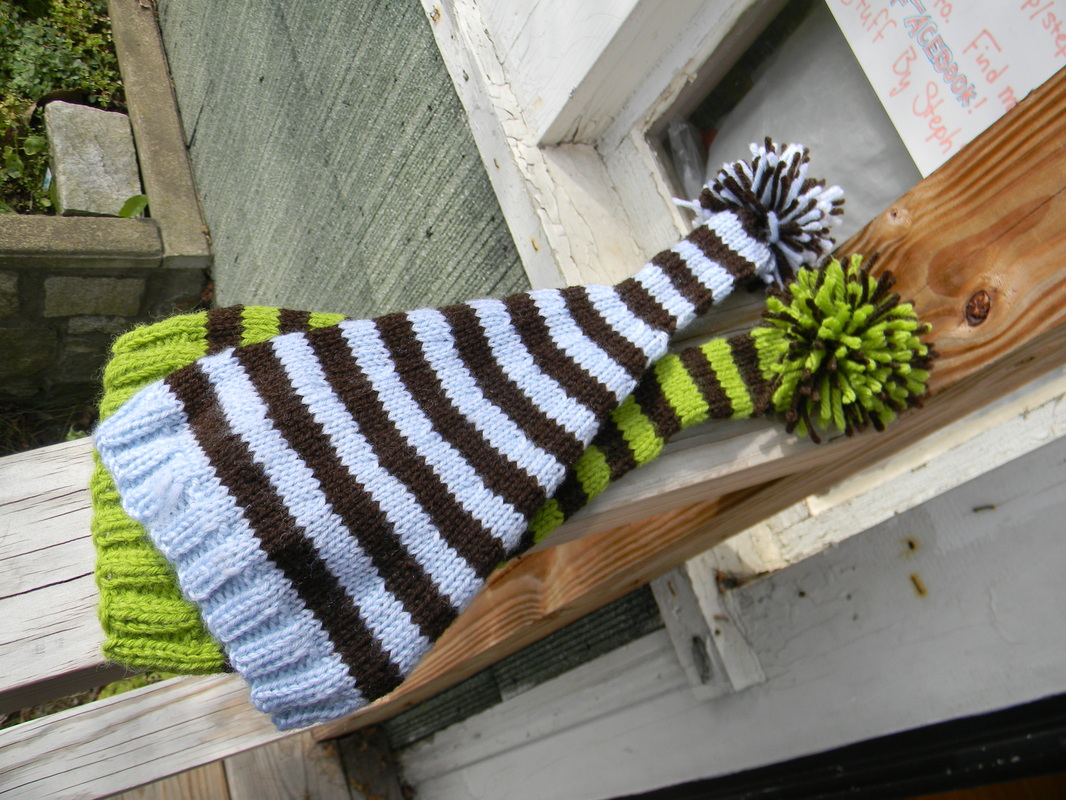
Okay, so I had some trouble coming across a good elf/stocking hat pattern a while back. I searched for days, only to find nothing. Then I found this. While it is a great pattern, it's only one size, and much too large for a newborn. Also, the top of the hat isn't long enough for maximum cuteness. So, with that pattern in mind, I altered it to fit my needs. This is what I came up with: [Note: the way I write patterns differs greatly from others, if you find yourself confused, shoot me an email!] Long Elf Hat
Newborn to 12 months
Supplies:
Size 7 DPN
2 skeins yarn in contrasting colors
Tapestry needle or latch hook
Abbreviations:
FC- First color
SC- Second color
K- Knit
P- Purl
R- row(s)
Directions:
With your first color, cast on 72 stitches across 3 needles (24 stitches per needle)
K2P2 for 8 rows
Knit 2 rows
Switch to second color, but do not cut FC. Bring FC over SC from the left (right, if you're left-handed like me) on every first stitch of the row.
K 4 R with SC
K 4 R with FC
With SC, *K 7, K2tog* around.
K 3 R
K 4 R with FC
With SC, *K 6, K2tog* around.
K 3 R
K 4 R with FC
With SC, *K 5, K2tog* around.
K 3 R
K 4 R with FC
With SC, *K 4, K2tog* around.
K 3 R
K 4 R with FC
With SC, *K 3, K2tog* around.
K 3 R
K 4 R with FC
With SC, *K2, K2tog* around. K 3 RK 4 R with FCWith SC, *K 1, K2tog* around. K3 R K 4 R with FCK 4 R with SCK 4 R with FCK 4 R with SCK 4 R with FCK 3 R with SCStill with SC, K2tog aroundCut yarn leaving a long tail (4-6 inches) and pull through remaining stitches. Make pom-pom using both colors and attach. Weave in/ tie loose ends.
 I'm a little late to the game on this one, ha! That's okay though. Over on Facebook, I've started a contest. It's free to enter, free to win. Absolutely, 100% free. There are a few stipulations. - You must like my page Stuff by Steph
- You must like the application the contest runs through
- You must be willing to submit your mailing address to me should you win.
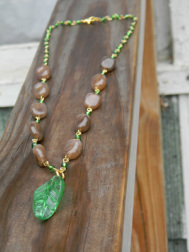
That's it! What's the prize, you ask? Well, have a glance to the right! Yep, that's right. I made it myself, and it's the first gold colored necklace I've made. I'd guestimate it's a prize worth at least $40. I promise the picture doesn't do it justice. It's really a unique piece made specifically for this contest. It could be yours, FREE. I'm not kidding. Just go enter!
|


 RSS Feed